Saturday, February 24, 2018

Front Room Wall


Here is Kara back in the summer - she tore up all of the flooring in the front room. That doorway leads to our bedroom, which we've determined was the original dining room. First we tore off all of that green paneling.


We discovered a wall of plaster - badly cracked and painted pink. Here you can see where I've patched, but I want you to notice on the left, the outline of a door, and to the right of the actual door, the outline of another door. We believe that on the right, the existing doorway was much wider - an opening so that the front room extended into the dining room beyond. We could see clearly a bad patching job where new plaster was used to fill it in. The doorway outline visible on the left, we believe was another door into the kitchen (which will now be our master bath). My job, with the Durabond, was to go over these uneven parts in the wall and fill in, so that the wall would be smooth and so that hopefully once we paint, you won't see the old outlines of doorways!


Here I am evening out the old doorway outline on the left. You can see, in the bottom right hand part of the photo, a large crack that I filled with Durabond - a dry mix compound, that hardens after mixed with water, by a chemical process. It dries hard, like cement. It is NOT plaster, but if you wet the plaster underneath, especially broken parts inside a crack, it will seal better to the plaster. You don't want to use regular drywall joint compound to do this patching, as it won't be as hard, and it won't adhere as well to the existing plaster.


I used a 6 inch knife to do all of my patching, as well as the skim coats. I tried...and tried and tried to master a trowel. I have evidence in the closet wall that I practiced on. It's supposed to go on smoothly. When my cousin Joann saw it she said, "Oh, are you creating some kind of texture on this wall?" hahaha - so no, I didn't quite master the smooth application of an expert troweler. That is a real skill for which I have great respect.


After the patching, I knocked down all of the bumps and ridges (hey with the edge of my expensive trowel, at least I am using it still!), and applied a thin coat of joint compound with the 6 inch knife. I was pretty pleased with the first layer, but, still working on my technique, I was discouraged that I STILL laid down ridges. Joint compound is softer, so I knew I could sand, but it was bugging me. I knocked down THESE ridges, with the trowel again, and it looked pretty good, but then I did my second layer of a skimcoat, and this time I thinned the compound quite a bit. (You can't "thin" Durabond, because once the chemical process of hardening starts, it will mess this up and change the mixture - but you can thin joint compound with water, because it dries with the air, and not through a chemical change if that makes sense).
Anyway, the thinner compound was way way easier to work with, and I managed to lay down a very smooth application. I was super proud and kept telling Matt what a great job I did, haha. I do have to sand it still, but you have to look really closely to see the imperfections.

And here we are with my beautiful wall! Next I prime it, and then paint it!

Before:

After:

Fun!

Monday, February 12, 2018

We Have A Shower!!!

We finally moved into the house, because our construction insurance ran out, and we needed to move in, in order to get regular insurance. We had two working toilets, a kitchen sink and no shower. Every night for almost 3 weeks, we have been driving into Spring Arbor where both sets of parents live, to take showers and do laundry. It was so nice of them to let us, but sometimes after a long day it was really hard to get into the car to drive all the way there just for a shower! The nice part of it was just getting to visit with our parents and touch base with them regularly.

This past week, Matt put the finishing touches on the shower and we tried it out! I sang an old hymn called, "Hallelujah, Thine the Glory" throughout my entire shower. Haha, mostly the hallelujah parts, it felt so good! I was worried that it wouldn't be hot enough, but it was just right. We don't have great water pressure yet, but that is fixable, and our shower head has a setting that ups the spray pressure a bit, so it's fine. I still can't believe what a great job Matt did, building this shower from nothing.


First we had to decide where to put everything in the bathroom. This room, as far as we can determine, used to be the original kitchen. We had an old toilet, removed from the existing bathroom (that is now becoming our laundry room), and set that up, along with some benches and random furniture to sort of help imagine where everything was going to go. Along the right side will be the double vanity. You can see the tape on the ground where we decided to put the shower. As you can see, there is nothing there - no drain, no water, nothing! The window on the left will be an exterior door, something like this eventually:


But back to our existing room. Eventually I will give a before and after (once the floor/vanity/sinks etc are installed and the room is painted) but for now I'm just giving a play by play of the shower.


First Matt had to build a wall. We decided to run the pipes through his wall, and not through the existing (plaster) wall, because this way the pipes were less likely to freeze in the winter.


After Matt built the wall, the plumber drilled a hole for the drain, and installed a shower pan over it. At first the wall was just going to be this high, but then Matt decided to run the wall all the way up to the ceiling. I think it had to do with being able to wire the shower light and the fan over the toilet, but I will probably come back and edit this sentence when I know for sure, haha. You can see the toilet drain has been plumbed as well (to the right).


After extending the wall to the ceiling, Matt installed green board, and the plumber came back to run the pipes to the shower faucet and head.


After that, Matt sealed up the green board and made it waterproof by painting it with several coats of a product called Redguard. It looked bright pink, but okay we'll call it red.


Then he started tiling. Matt has done a lot of tilework on floors, and he has done a kitchen backsplash with small tile, but this was his first time working with large tile on a vertical surface. I chose this tile color because the floor is going to be black (slate), and the walls are going to be white (Alabaster). I didn't want to break up the white walls with a dark shower, or to have it be very busy. This was an inexpensive standard tile that they carry at Lowe's. We chose an offset pattern for stability and style! Matt is meticulous with his lines.


Matt had to buy a new wet saw for this job - this is not an expensive saw, and he got it on clearance, but it was way better than what we've used before for small jobs. Matt is always sad when he has to buy a new tool. 😂


Next came the grout. We took WAY too long choosing between two very very similar shades of grout - either would have looked just fine, and we're really happy with how it turned out. Sometimes it's nice to have your lines accentuated by a contrasting grout color, but we wanted to stick with a more seamless look as far as color. Like I said before, I didn't want a lot of busyness in our design. Here is Matt wiping down the grout:


I didn't get any photos of Matt sealing the grout, but he did a super thorough job, and water just beads up nicely on it. Next was a really exciting moment for me!


Finally our beautiful shower!!!


Here you can see the light that Matt and Ron installed above the shower, and then there is a fan above the toilet that you can't see. As soon as we can save up the money, we will be installing a glass shower door (with oil-rubbed bronze trim) but for now we just have a cheapy tension rod and a curtain and it works fine!

You can see above, the tile board that Matt has already put down on the floor, getting ready for the slate tiles (in the boxes). We have a "runway" of a carpet remnant that makes it nice for now to walk out of the shower. We always stuff a towel into the nooks at the base of the shower just to make sure no water gets into any cracks down there before it's sealed up with tile. (Matt has caulked it - but just to make sure).

It's a long way from this!  We[re getting there!

And just to prove that we are actually using our new shower....(this is me, super excited after being the first to use it!)

Friday, December 22, 2017

Patching Plaster....Durabond

After reading every possible technique for patching plaster, I have determined that there is NO consensus on how to do it right. Use mesh tape for cracks? Fiberglass tape? Paper tape or no tape at all? Plaster of Paris mixed with lime putty? Joint compound? Premixed? Or hot mud?

I decided to go with no tape, and to use Durabond 90 to fill the cracks, and then top with EasySand 45. I chose high numbers (drying time) to give myself plenty of time, and decided to start in the closet so if it turns out terrible, who cares!

Our farmhouse is filled with cracks and pitted walls...and they say the cracks will always be there but I wanted to do my best to prep the walls before painting, so here we go!

Beth and I tackled a coat of Durabond today, I'll post progress photos tomorrow!


Sunday, December 17, 2017

2 Steps Forward 1 Step Back

As I said, we are living and learning. The wallboard on the ceiling in the kitchen was just not working. On the advice of Travis, the entire ceiling has been torn down - on Monday Matt and Travis will re-insulate the ceiling and put wallboard up so that it's all uniform. Matt's on vacation this week, but this ceiling was not what he was hoping to work on. That's okay, we keep saying, the interruptions and surprises and constant projects are what this house is all about for us. :)

In bathroom news (the news I'm always most invested in because when that is complete we can MOVE IN), yesterday Matt and I got some stuff done. He extended the bathroom wall up to the ceiling, and then put up a type of wallboard that is mold and mildew resistant and meant for shower walls. It was interesting to watch him make the measurements and cut holes where he hoped the faucet and handle would go and voila, it fit perfectly! Then he drilled it into the frame. It's nearly ready to be tiled!

First though, they will drill up through the new frame into the ceiling and snake some wiring in there for a shower light and fan. I ordered the tile a few days ago - I'm a little nervous about what I chose, but I'm going with my gut that it will turn out to look cool in the end!

We keep haunting craigslist for a vanity that will work temporarily - we are looking for a 2 bowl 60 inch vanity. We'd just like to put off spending a lot right now on it, so want something we can just throw in there until we save up for a nice one. I found one for $45 and reached out to the owner, but they posted it a month ago so I'm sure it's gone! That's a pretty amazing price, wouldn't that be great if they still had it?? We will see.


Saturday, December 9, 2017

Photos Catch-up

Well we moved! Into Matt's parents' basement apartment where we are very comfortable but also longing to be in our new home! Our requirements are a working toilet and shower, even if the rest of the house is a construction mess. But first we need a bathroom floor (ceramic tile, installed by Matt), and lights/fan in the bathroom. We've even determined that we can do without a bathroom vanity for now - hey we have a kitchen sink! The vanities we like are around $1,000, so we'd like to reserve our cash for the priority of getting the house siding fixed and painted.

Backing way up because I can't seem to keep up with the blog, here is Matt doing the awful job of pulling up this VCT tile in what we are calling "Michael's room" (since Michael just bought a house, it's highly improbable that he'll ever live here, but still, he has a room:


He did the same thing in the hallway - the original tile is the checkerboard near Michael's bedroom door:

I've been working on Kara and Beth's room, scraping wallpaper (that has been painted) - all of the wallpaper is now gone! It sort of looks worse than before, but here and in the master bath I will be learning how to patch and skim-coat plaster:
The purple is "before" - you can see the wallpaper peeking through to the left of the double windows:


The other room where I've been scraping is the Master Bath - I'm not quite done here, but I moved upstairs to the girls' room because Matt decided to tear down the ceiling in the kitchen and there was way too much dust down there!
Here's the green painted wallpaper coming down:

 Here you can see the shower being built! Since this photo, we've decided that that wall Matt built is going to have to extend to the ceiling in order to put in electrical for the shower fan/light. Living and learning!

A "finished" wall - ready to be patched and painted! That window will be an exterior door:

I bet this wallpaper was really cute - it's what was hiding under the paint, but it has to go:

So the ceiling in the kitchen/addition was lower than the original ceiling. Matt decided to knock it down and put up new wallboard to match the ceiling heights so that it is uniform all the way across. What a mess!

This is Matt's friend Charlie helping to tear down the ceiling:


The old insulation was knee deep in the kitchen:


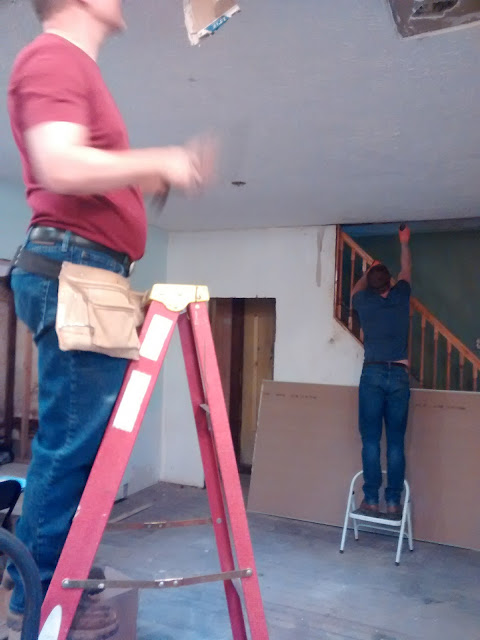
The new wallboard is up on the ceiling now (that's Trevor who put the wallboard up in the half-bath you can see here, and also the ceiling), except part of it is sagging in the middle. Matt and Travis have decided to climb up in the ceiling and bolster the middle with 2x6's and bolt them to the rafters (I probably have the details wrong), something Travis says, "Would have been good to do before you put that wallboard up," but we are just figuring things out as we go, so apparently we like to do it the hard way, haha.  
Travis is painting those boards above and fixing the fascia and soffits on the outside of the house (the area right under the lip of the roof) so that gutters can be installed. He is painting them white with Kilz, and it's making us excited to have the whole house white when it's finally painted! Here he is working on the fascia:

That's all for now!